Monday, November 16, 2009

Pointed criticism, if accurate, often gives the artist an inner sense of relief. The criticism that damages is that which disparages, dismisses, ridicules, or condemns. ~William Ernest Henley

Just a though....
I submitted all of our work Friday afternoon. They will begin jurying the work Monday (today). The county will return prints that did not make it into the show. The exhibit will start in late December and will run thru March of 2010!

We are now into studio lighting. I am very excited with the work I have seen so far!! For some of you, we may need to work on developing our film. It's very disappointing when the film doesn't turn out! I will work with you! 

You also need to start thinking about the paper that is due on or by Friday, December 11, 2009. You need to pick a photographer  from the list compiled by Ms. Miles and myself. Write a three to five page essay on why you chose this photographer. Include images( which do not count as a page!!!), your view on what you like or do not like about their work. You may talk about the different categories they fall under, for example, Fashion, documentary, and fine art. Some photographers fall into all three some specifically fall into one.
All papers must follow the MLA format, here is an example. The papers must be typed, double spaced and use Times New Roman font!! I will print up a rubric for you to follow. The grade for your paper is the same as completing a print assignment.  

Thursday, October 29, 2009

What's next?

We are moving right along! The next project we will work on will be studio lighting. This is when you need to bring in your film that is labeled 400. 
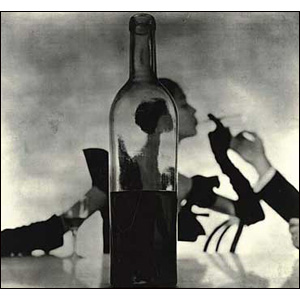
You will learn how to use one light source to illuminate a person or a still life.  Below are some examples.
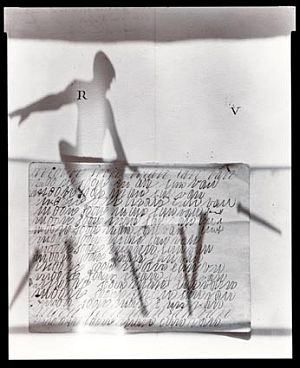
This one too.
Please peruse through these images, come prepared to shoot. It helps if you can think about what you would like to shoot in the studio.

Thursday, October 15, 2009

Questions for Chapter 3

1 Describe the relationship between the shutter speed and the aperture (f-stop) when making photographs.

2 Describe three different methods of dealing with motion in photographs.
 4th, 5th & 6th period these are due by the end of class Tuesday, October 20th.


Monday, October 12, 2009

20th Anniversary of the Berlin Wall


This is an impressive performance piece I encourage all of you to look at. Look at all the photos. The puppets alone are impressive!! http://www.boston.com/bigpicture/2009/10/the_berlin_reunion.html
It's a wonderful performance piece commemorating the 20th Anniversary of the tearing down of the Berlin wall!

Monday, October 5, 2009


First assignment is coming due...what does this mean You need to start finishing up printing. I would like two final prints!! We are now getting ready to start shooting our second assignment. Please get in the habit of having a roll or two of film in your back pack. Our second assignment is on depth of field. Examples here & here & here. Just some ideas! 

Wednesday, September 23, 2009

Contact Sheets

Hi photo 1 students. We are moving right along. I wanted to give you some information to read and know about this class. First, some of you are having a hard time exposing for the right amount of time to make contact sheets from your negatives. If your negatives look dark- the term you have heard me use is Dense. This means that they were overexposed(the prints will be too light). If your negatives look gray or almost clear they are underexposed( the prints will be too dark).

Below I have copied a handout on how to make contact sheets & test prints. We make test prints first before we print on a full sheet of paper.
Instructions

Things You'll Need:

  • Enlarger Timers
  • Photographic Print Papers
  • Enlargers
  • Photo Negatives
  1. Step 1

    Secure the lens in the enlarger head, which sits directly above the baseboard. Rotate the aperture ring on the lens to f-8 and switch on the enlarger light.

  2. Step 2

    Raise or lower the enlarger head using a knob typically located on the right side of the enlarger support column.

  3. Step 3

    Focus the light using the knob usually found just to the right of the lens until a rectangle of even light covers the baseboard.

  4. Step 4

    Switch off the enlarger light.

  5. Step 5

    Place a sheet of print paper on the baseboard, emulsion - or shiny - side up.

  6. Step 6

    Place negatives emulsion-side-up on top of the print paper.

  7. Step 7

    Lay a piece of glass over the negatives to hold them in place.

  8. Step 8

    Set the enlarger timer for 10 seconds. The time will vary depending on the density of the negative.

  9. Step 9

    Switch on the timer.

  10. Step 10

    Expose the print paper.

  11. Step 11

    Remove it and place it in a developer tray.


Making a test print

Make a test print of different exposure times, with each strip showing a clear difference from one to another. I normally use three to five second intervals between each strip, to give me a vast range of tones from too light to too dark. You need a piece of cardboard to cover 3/4 of the image. Move it down a little at a time to get a wide variety of time. See example.

Once developed look at test print under the light. Choose the best time to complete a final print.

Work print
So, I figured out that I would expose a straight print for 30 seconds.


Making the final print
Once you have the exposure times clear in your head, proceed to expose the final print.

Please read over these instructions as you wait to have a chance in the darkroom!!!