
Monday, November 30, 2009
Monday, November 16, 2009

Pointed criticism, if accurate, often gives the artist an inner sense of relief. The criticism that damages is that which disparages, dismisses, ridicules, or condemns. ~William Ernest Henley
Just a though....
I submitted all of our work Friday afternoon. They will begin jurying the work Monday (today). The county will return prints that did not make it into the show. The exhibit will start in late December and will run thru March of 2010!
We are now into studio lighting. I am very excited with the work I have seen so far!! For some of you, we may need to work on developing our film. It's very disappointing when the film doesn't turn out! I will work with you!
You also need to start thinking about the paper that is due on or by Friday, December 11, 2009. You need to pick a photographer from the list compiled by Ms. Miles and myself. Write a three to five page essay on why you chose this photographer. Include images( which do not count as a page!!!), your view on what you like or do not like about their work. You may talk about the different categories they fall under, for example, Fashion, documentary, and fine art. Some photographers fall into all three some specifically fall into one.
All papers must follow the MLA format, here is an example. The papers must be typed, double spaced and use Times New Roman font!! I will print up a rubric for you to follow. The grade for your paper is the same as completing a print assignment.
Thursday, October 29, 2009
What's next?
We are moving right along! The next project we will work on will be studio lighting. This is when you need to bring in your film that is labeled 400.
You will learn how to use one light source to illuminate a person or a still life. Below are some examples.
This one too.
Olivia Parker and here.
Please peruse through these images, come prepared to shoot. It helps if you can think about what you would like to shoot in the studio.
Thursday, October 15, 2009
Questions for Chapter 3
1 Describe the relationship between the shutter speed and the aperture (f-stop) when making photographs.
2 Describe three different methods of dealing with motion in photographs.
4th, 5th & 6th period these are due by the end of class Tuesday, October 20th.
Monday, October 12, 2009
20th Anniversary of the Berlin Wall

This is an impressive performance piece I encourage all of you to look at. Look at all the photos. The puppets alone are impressive!! http://www.boston.com/bigpicture/2009/10/the_berlin_reunion.html
It's a wonderful performance piece commemorating the 20th Anniversary of the tearing down of the Berlin wall!
Monday, October 5, 2009

First assignment is coming due...what does this mean You need to start finishing up printing. I would like two final prints!! We are now getting ready to start shooting our second assignment. Please get in the habit of having a roll or two of film in your back pack. Our second assignment is on depth of field. Examples here & here & here. Just some ideas!
Wednesday, September 23, 2009
Contact Sheets
Hi photo 1 students. We are moving right along. I wanted to give you some information to read and know about this class. First, some of you are having a hard time exposing for the right amount of time to make contact sheets from your negatives. If your negatives look dark- the term you have heard me use is Dense. This means that they were overexposed(the prints will be too light). If your negatives look gray or almost clear they are underexposed( the prints will be too dark).
Below I have copied a handout on how to make contact sheets & test prints. We make test prints first before we print on a full sheet of paper.
Making a test print

Below I have copied a handout on how to make contact sheets & test prints. We make test prints first before we print on a full sheet of paper.
Instructions
Things You'll Need:
- Enlarger Timers
- Photographic Print Papers
- Enlargers
- Photo Negatives
- Step 1
Secure the lens in the enlarger head, which sits directly above the baseboard. Rotate the aperture ring on the lens to f-8 and switch on the enlarger light.
- Step 2
Raise or lower the enlarger head using a knob typically located on the right side of the enlarger support column.
- Step 3
Focus the light using the knob usually found just to the right of the lens until a rectangle of even light covers the baseboard.
- Step 4
Switch off the enlarger light.
- Step 5
Place a sheet of print paper on the baseboard, emulsion - or shiny - side up.
- Step 6
Place negatives emulsion-side-up on top of the print paper.
- Step 7
Lay a piece of glass over the negatives to hold them in place.
- Step 8
Set the enlarger timer for 10 seconds. The time will vary depending on the density of the negative.
- Step 9
Switch on the timer.
- Step 10
Expose the print paper.
- Step 11
Remove it and place it in a developer tray.


Making a test print
Make a test print of different exposure times, with each strip showing a clear difference from one to another. I normally use three to five second intervals between each strip, to give me a vast range of tones from too light to too dark. You need a piece of cardboard to cover 3/4 of the image. Move it down a little at a time to get a wide variety of time. See example.

Work print
So, I figured out that I would expose a straight print for 30 seconds.
Making the final print
Once you have the exposure times clear in your head, proceed to expose the final print.
Tuesday, September 22, 2009
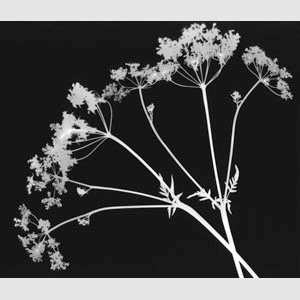
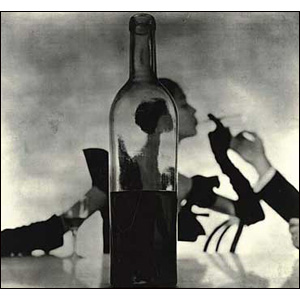
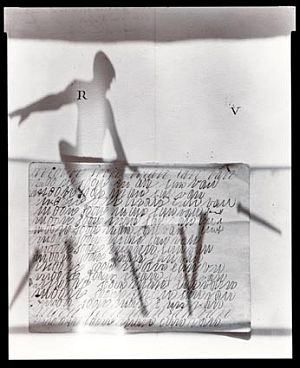
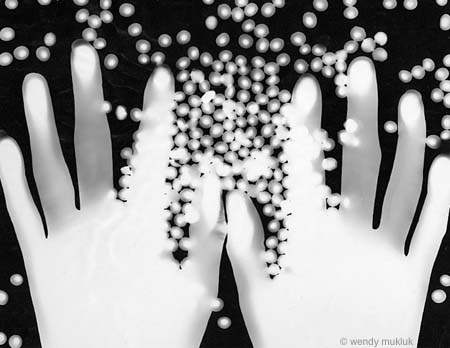
Photograms
I have added a minnie lesson here to have you all become familiar with printing in the darkroom.
Photograms is an art form that uses traditional darkroom printing techniques. You are going to create artistic shapes on photo paper in the darkroom.
"A photogram takes the principles of photography right back to its roots using light to paint pictures. The principle is simple - you expose a sheet of light sensitive emulsion, in our example photographic paper, to light and block its path with the subject to create silhouette shapes were the light is blocked. Fox Talbot had used this technique to make shadowgrams, but it was arguably the surrealist Man Ray who made the technique popular. He stumbled across the process by accident when he placed a small glass funnel, graduate and thermometer over an unexposed sheet of paper that had accidentally been previously submerged in developer. When he turned on the light he noticed silhouettes of the objects begin to appear, distorted as the subject became further away from the emulsion. He started to experiment with other objects exposing them first to light and called the resulting photos rayographs. Man Ray's rayographs have a three-dimensional feel with various tones of grey as the 3D subject distorts the light. Fox Talbot's paper negatives are more two-dimensional because the subject, feathers, leaves etc are in contact with the paper."
http://www.ephotozine.com/article/Making-a-photogram--traditional-darkroom-ideas-4688
Check out these examples!
Monday, September 14, 2009
Sunday, September 13, 2009
Rubric used for grades
Originality - Piece demonstrates originality in thinking, unique approach, and risk-taking.
Quality/Craftsmanship - Excellent attention to detail, camera angle, lighting, exposure, photoshop, and mounting.
Concept/Cohesiveness- Evidence of sophisticated thinking behind concept.
Presentation - Thorough explanation of resources, historical influences, growth and discovery.
Composition - Thoughtful and effective use of elements and principles of art/design.
Reflection - Describe, analyze, interpret, and judge your own work. Length is not as important as content. Remember that we can not read your mind, so be very specific and detailed about what you were trying to say with your work. How do all the elements work together to communicate your idea.
PHOTOGRAPHY 1,2 (3691) Grades 10-12
THIS COURSE IS RECOMMENDED FOR ALL STUDENTS PURSUING CAREERS IN DIGITAL PHOTOGRAPHY, DRAWING , PAINTING, DESIGN, MIXED MEDIA, AND WEB PAGE DESIGN.
Prerequisites: Art 1,2 with a grade of “C” or better, or teacher recommendation.
This one-year course in black and white photography will teach students basic photo techniques such as camera use, exposure control, film processing, contact printing and enlarging, use of studio lights, filters, light meters and reflectors. Students are not required to furnish their own 35 mm Camera. Film, paper, and other supplies (approximately $25 per semester) are required unless you cannot afford it. All film developing and printing chemistry and equipment will be furnished and maintained by the school. Challenging assignments will be given to expose students to the principles of this medium and to improve their photographic eye. Digital imaging and the use of Photoshop software will be integrated into the course. All students will be encouraged to enter the Del Mar Fair and other San Diego shows including the annual show at the Museum of Photographic Arts.
Supplies: A supply list with information on how to purchase it will be provided with a letting the first week of school.
Course Rules: Camera strap must be around your neck when you are in possession of 35mm camera. All food and drink is a hazard and should not be consumed while operating any equipment including computers. This is not a ROP course so the computers are only to be used if you have a flash drive to save work. Work saved on the computer may be placed in trash at the end of the day to ensure that space is available. Use of the computers for anything other than course work is not permitted, and you will be asked to move if you are using it for none class related activities. No cell phone usage during class, and IPod usage is not permitted during class discussion. A reflection is required to receive a full grade. No visitors or leaving class without permission, and you must check in and out on clipboard. Removing any equipment or private property that does not belong to you is against the law and all violations will be reported to the SD police department. SD police will not investigate cell phone or IPod theft, so if you bring it to school you are at risk.
Al prints due will be in Black & White.
9/8- 9/12 – Class Rules, Create Blog, Introduction to Dark Room Safety
9/14- Shoot a roll of film show 5 different angles
9/23- 2-3 prints due
9/28- Depth of Field assignment
10/5- 1 print due from Depth of field assignment
10/12- Motion
10/21- 2 prints due
10/26-Portraiture- students will take three different types of portraits-head shot, three quarter, and full length
10/15- Studio lighting
11/4- 1-2 prints due from portraits assignment
11/9 in studio assignment- still lives
11/18- 1 print due
11/30-Sequencing- minimum of 5 prints due
1/29 – Hand Made Book for Photo sequencing
11/15 – Photo History Assignment Paper on a famous Photographer
1/8 Intro to Digital photography - Photoshop assignment
1/9-1/12 1 image due digitally
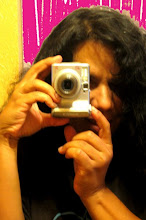
1/9 Photo Booth Assignment/ self portraits using a variety of personas
2/1 all assignments due!!!!!!
Al assignments will be discussed in class. Some dates are subject to change depending on holidays and other things which may arise in the semester!
Lesson Plan for Photography 1-2
Title: First Assignment Shooting film/ Learning to load film onto reels.
Length: 3-4 class periods
Objective: Students will shoot a roll of film to familiarize themselves with manual, SLR cameras. They will also learn to load film onto reels in order to develop their negatives.
Students photographing will go out in groups of two to shoot a roll of film. Each shot must have a person in it, students must show at least five different angles.
Contact sheet and 2-3 images due at the end of project.
Students who are not out photographing, will be learning to load film onto reels.
Learner Differentiating Strategies: Students having difficulties working on the assignment will be paired up with a peer.
Students will be able to read about the process in the Photo text book as well as view visual images to help them understand the process for English Learners.
Standards: 2.0 Creative Expression, 1.0 Artistic Perception, 2.1
Assessment: Students will be graded on the success of developing their roll of film and on the prints they will make from their film.
Students must then up load their final print to their weblog and write a reflection.
Lesson Plan for Photography 1-2
Title: Writing reflections
Length: 1 class period
Objective: Students will be able to describe and critique their work using the correct art vocabulary, as well as other works of art they come into contact with.
Students will be shown two or three photographs and ask students to describe what they see. Encourage students to be descriptive explaining what makes the image dynamic, interesting? Students will then be shown a power point explaining the correct procedure they must use when talking about their work or other works of art.
Standards: 1.0 ARTISTIC PERCEPTION
Processing, Analyzing, and Responding to Sensory Information Through the Language and Skills Unique to the Visual Arts
Students perceive and respond to works of art, objects in nature, events, and the environment. They also use the vocabulary of the visual arts to express their observations.
Develop Perceptual Skills and Visual Arts Vocabulary
1.1 Identify and use the principles of design to discuss, analyze, and write about visual aspects in the environment and in works of art, including their own.
Learner Differentiating Strategies: Students having difficulties working on the assignment will be paired up with a peer. The power point will be a visual aid to help students see the process of sequencing.
Assessment: Students will be assessed on the use of the correct art vocabulary when they write about their own work or others. All reflections must accompany their final prints up on their weblog.
Lesson Plan for Photography 1-2
Title: Elements of Design
Length: 1 class period
Objective: Students will learn the vocabulary used to describe artwork.
Students will look at photographs and describe what they see using the correct art terms.
Students will be shown a power point and given a handout on the vocabulary and definitions.
I will work individually with the special needs student or have a peer help out.
Standards: 1.0 ARTISTIC PERCEPTION
Develop Perceptual Skills and Visual Arts Vocabulary
1.1 Identify and use the principles of design to discuss, analyze, and write about visual aspects in the environment and in works of art, including their own.
1.2 Describe the principles of design as used in works of art, focusing on dominance and subordination.
Analyze Art Elements and Principles of Design
1.3 Research and analyze the work of an artist and write about the artist's distinctive style and its contribution to the meaning of the work.
1.4 Analyze and describe how the composition of a work of art is affected by the use of a particular principle of design.
Learner Differentiating Strategies: Students having difficulties working on the assignment will be paired up with a peer. The power point will be a visual aid to help students see the process of sequencing.
Assessment: Assessment will be done informally by class discussions and questions. Also, by reading their verbal responses to their own work and others. They will be assessed formally when they submit their final prints and reflect on their work in the coming weeks. Students must show the use of an element of design in their images.
Lesson Plan for Photography 1-2
Title: Sequencing
Length: 3-4 class periods
Objective: Students will understand the purpose of photo sequencing.
Students will be able to tell a story using five or more images.
Students will understand how to take more interesting pictures.
Students will be shown a brief power point showing students a few different photo sequences from different photographers. I will talk about the photographers and have the students discus some of the work they are seeing. I will also touch upon developing a plot or story line.
Standards: Impact of Media Choice
1.5 Analyze the material used by a given artist and describe how its use influences the meaning of the work.
1.4 Analyze and describe how the composition of a work of art is affected by the use of a particular principle of design.
2.0 CREATIVE EXPRESSION
Skills, Processes, Materials, and Tools
2.1 Solve a visual arts problem that involves the effective use of the elements of art and the principles of design.
Learner Differentiating Strategies: Students having difficulties working on the assignment will be paired up with a peer. The power point will be a visual aid to help students see the process of sequencing.
Assessment: Students will be graded on the success of developing their roll of film and on the prints they will make from their film.
Students must complete a minimum of 6 images that successfully shows a sequence of an event.
Students must then up load their final print to their weblog and write a reflection.
Lesson Plan for Photography 1-2
Title: Introduction to Photoshop
Length: 1 class period
Objective: Transform a photo using various editing techniques.
Adjust the color of a picture
Apply filter effects to transform a picture
Retouch a picture to remove imperfections
Projected on a screen, students will be shown how Photoshop works. Students will also receive a handout describing basic functions of Photoshop. I will go over all the basic functions from creating a new file, a few functions of the tools and how to save their file. Students will then have to follow a basic tutorial on line and complete one exercise using their own imagery and reworking them in Photoshop.
Standards: 2.0 CREATIVE EXPRESSION
Creating, Performing, and Participating in the Visual Arts
Students apply artistic processes and skills, using a variety of media to communicate meaning and intent in original works of art.
2.3 Develop and refine skill in the manipulation of digital imagery (either still or video).
Learner Differentiating Strategies: Students having difficulties working on the assignment will be paired up with a peer. The power point will be a visual aid to help students see the process of sequencing.
Assessment: Students must upload their images to their web log and reflect on today’s activity. What did they learn, was it useful, was it difficult or easy, etc.
Lesson Plan for Photography 1-2
Title: Photo Booth Assignment
Length: 3-4 class periods
Objective: Students will be able to create an digital image.
Students will cut and Paste several images to create one final image.
Students will be shown the work of Tomoko Sawada, a Japanese photographer who works in film and creates self-portraits. Students must recreate one of her projects. She photographs herself as many different personas. Students will recreate her work digitally. Students must take a minimum of 4 sellf-portraits and combine them into one image,
Standards: 2.0 CREATIVE EXPRESSION
Creating, Performing, and Participating in the Visual Arts
Students apply artistic processes and skills, using a variety of media to communicate meaning and intent in original works of art.
2.3 Develop and refine skill in the manipulation of digital imagery (either still or video).
Learner Differentiating Strategies: Students having difficulties working on the assignment will be paired up with a peer. The power point will be a visual aid to help students see the process of sequencing.
Assessment: Students must upload their images to their web log and reflect on the process. What did they learn, was it useful, was it difficult or easy, etc. They should refer to their reflection handout.
Tuesday, September 8, 2009
Welcome

Greetings students and parents,
Welcome to my blog. I am Mrs. Alvarez and I will be teaching photography 1 class along with Ms. Miles this semester. This blog was created to show examples of the photography student's completed work from our photography 1 class. The other purpose is to link all of the students together so that they can create a community of artists, and comment on each others work.
Subscribe to:
Comments (Atom)